Free server Linux building tutorial 🍃
Create a free server with github + 16G Ram + 4 Core + Speedtest
Free server Linux building tutorial 🍃
How to Use a Free Server on GitHub
Hi guys, today I want to teach you how you can create a free server Linux with github.
Steps 1
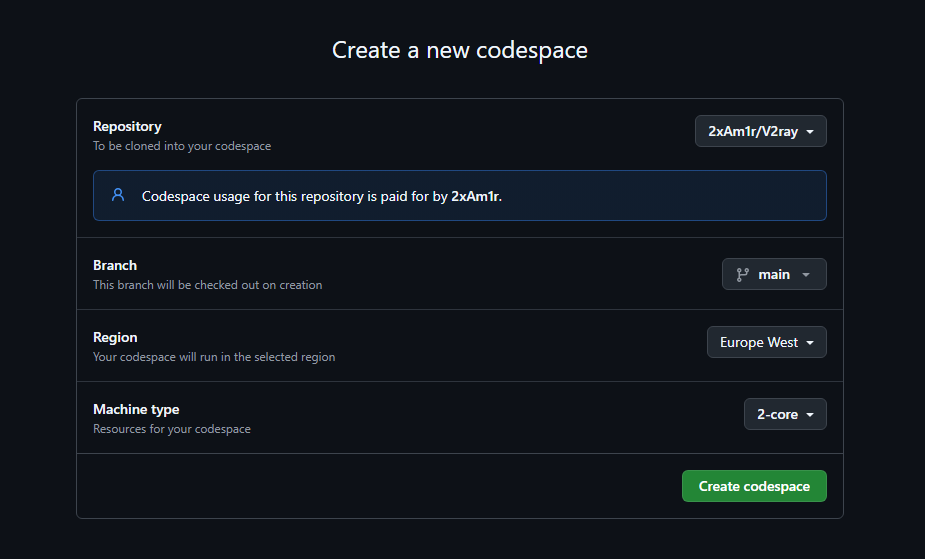
- In the first step, you need to log in to your GitHub and go to the codespaces section, then create a codespace (:
- In the first section, select a repository (preferably create one).
- In the branch section, set the default and set the region to the continent where you want the server to get an IP (random country).
- Depending on your hardware needs, adjust and build the machine type section.
- Wait a few moments for the VSCode environment to fully open.
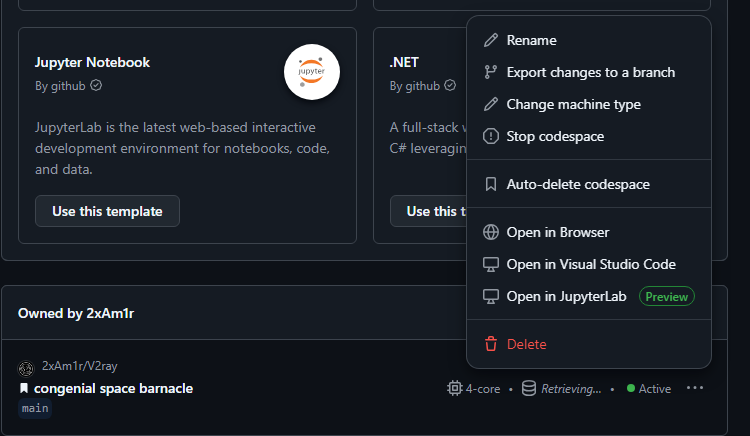
Now go to the codespaces section and disable the auto delete codespaces checkbox.
Terminal Commands
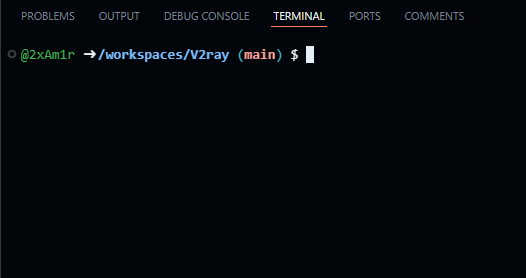
Now we are dealing with this part called the terminal. Execute the commands one by one and wait until the terminal finishes working before moving on to the next command.
Tip: How do we know when the terminal is finished? As in the picture below, the line of code ends with $, meaning the terminal is ready to enter!
sudo apt updatesudo apt upgradesudo DEBIAN_FRONTEND=noninteractive \apt install --assume-yes xfce4 desktop-base dbus-x11 xscreensaversudo apt install ubuntu-desktopsudo apt install screenwget https://dl.google.com/linux/direct/chrome-remote-desktop_current_amd64.debsudo apt install ./chrome-remote-desktop_current_amd64.debsudo bash -c 'echo "exec /etc/X11/Xsession /usr/bin/xfce4-session" > /etc/chrome-remote-desktop-session'sudo service lightdm stop
Steps 2
- Now you need to go to the Remote Desktop site and in the setup via SSH section, click "Begin", then "Next", and "Authorize".
- Copy the link in the Debian Linux section.
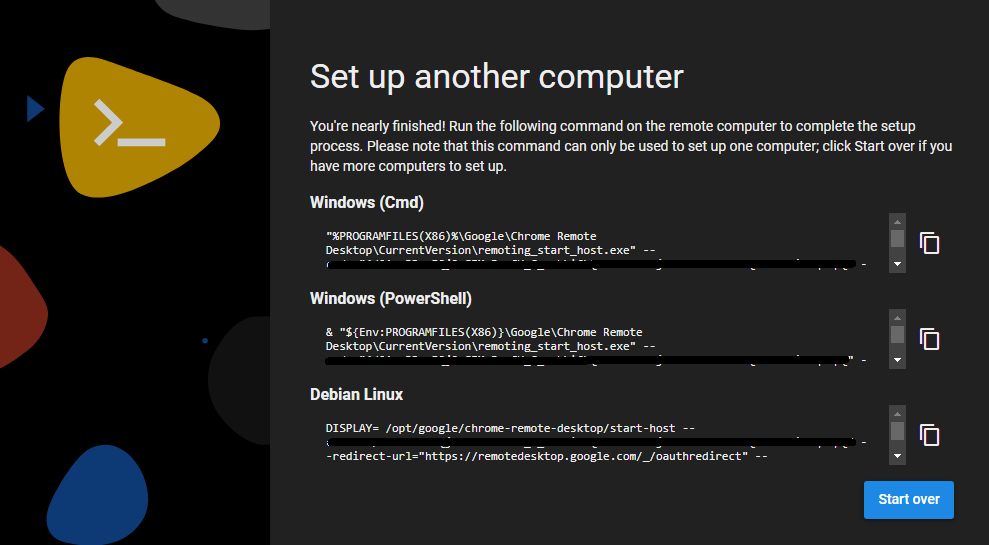
- Enter the copied link into the terminal.
- Enter a 6-digit PIN when prompted, and do not forget it.
- It should say "Host started successfully". Then go back to the site, and in the remote access section, you should see the remote access created for you.

Testing Your Server
Now you click on codespace and enter your PIN.
And boom boom, your server is ready to use 🥳🤝 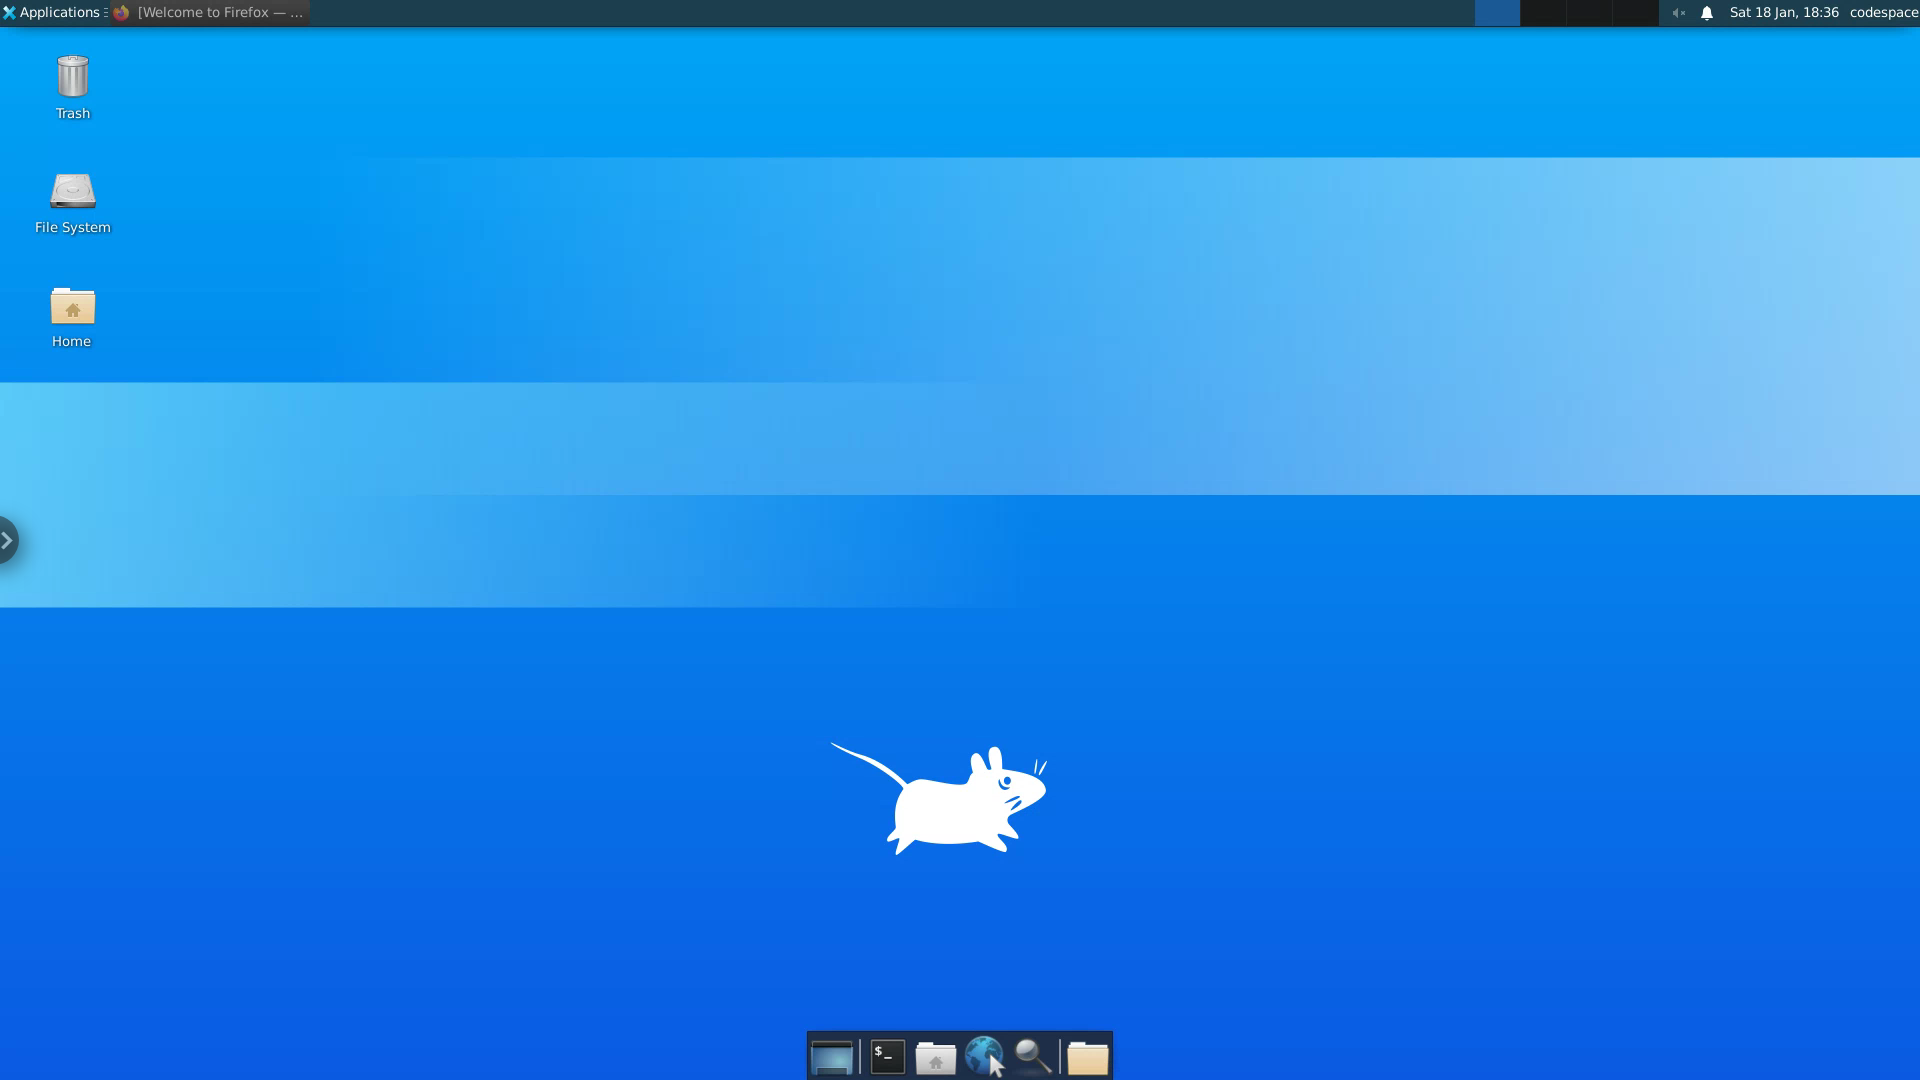
speedtest server 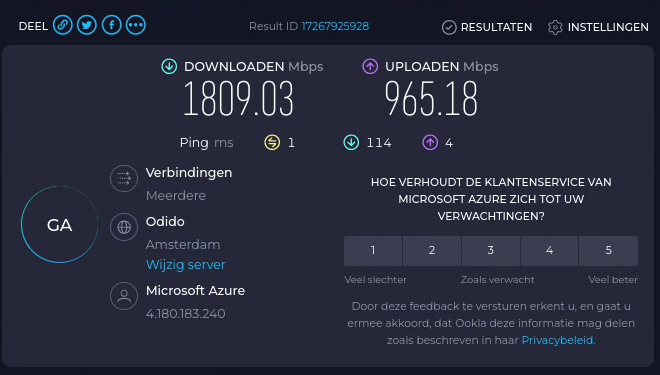
If you liked this tutorial, I would appreciate it if you could support me on social media. 😊
Social Media

This post is licensed under CC BY 4.0 by the author.